1. Deep Groove Radial Ball Bearings (6206 for MT3 spindle) - These are the same as the stock bearings and come as either sealed or shielded. Shielded actually have a tiny gap between the shield and the inner race, so they don't protect as well, but they also produce less heat and have a higher top speed. Sealed protect the bearing better, but they'll produce noticeably more heat and, once they're installed and preloaded, their top speed will be about the same as the top speed of a belt driven mini mill.

ABEC-3 bearings should be used in the mini mill for the lower runout, though most Japanese bearings, even if they're listed as ABEC-1 will actually be ABEC-3. A lot of replacement bearings you see are C3 tolerance. The C3 indicates they have greater clearance inside the bearings. On the mini mill they should be ok to use since the bearings are preloaded. You can also use CN (normal internal clearance) or C2 (reduced internal clearance).
The downside of deep groove radial ball bearings is they cannot handle a lot of preload, and preload is what produces a stiff spindle. In addition, as you preload them their runout increases.
2. Tapered Roller Bearing (30206 for MT3 spindle) - A popular upgrade are tapered roller bearings (TRBs), with people often using cheap car axle bearings. These bearings are incredibly rigid and allow virtually no deflection. They can take huge loads (much higher than a mini mill is capable of). The problem is those axle bearings have a max runout of 0.001" which is pretty bad. On a mill low runout is especially important, as it effects tool chip load, especially on small diameter tools. You can buy higher TRBs (minimum grade C or P5) but they're not easy to find and can be quite expensive. Additionally, TRBs are very sensitive to preload, and have a very small window of acceptable preload. TRBs are also 1.5mm deeper than the stock bearings, which can require some modifications. There are no sealed versions, so some form of seal needs to be fabricated to keep contamination out and grease in. Considering their mounted vertically in the mini mill, keeping the grease in place can be a challenge. Finally, they cannot spin nearly as fast as ball bearings.
 |
| Tapered roller bearing cutaway. |
3. Angular Contact Ball Bearings (7206 for MT3 spindle) - Unlike deep groove ball bearings, ACs are able to take both axial and radial loads. However, AC bearings are directional, meaning they can only take axial load in one direction. In fact, there is play between the bearing races until preload is applied. ABEC-3 precision 7206 ACs (roughly equal to TRB class C or P5) are fairly readily and relatively cheaply available. They're also the same dimensions as the stock bearings, which make it a direct swap. ACs are much more tolerant of a wide range of preloads, which makes setting the preload much easier and more forgiving than with TRBs. While ACs are less rigid than TRBs, for a machine as small as a mini mill it shouldn't matter at all.
 |
| Angular contact ball bearing cutaway. |
On a related note, you may have seen instruction for installing ACs on the mini lathe on other sites. The problem with those instructions is they have you pressing in the bearing through the rolling elements. In other words, you're applying pressure to the inside race in order to press the outside race into its bore. You should never do this. The manufacturers will always tell you not to press the bearing through the rolling elements because, while the bearings can handle high dynamic loads, the high static load from pressing can damage both the races and the balls themselves, greatly reducing the life of the bearing.
Before starting, I chucked the spindle in the lathe and sanded the top bearing seat with 400 sandpaper then a Scotch-Brite until the bearing was a light press fit. It's important to accurately set the preload later on, and apply less static force on the bearing while doing so.I made a press for the bearing so I wouldn't have to remove the mill head. Since both the outer and inner races are a press fit, I needed to make adapters for the press which would push both inner and outer races equally. You never press a bearing through the rolling element or you'll destroy it! The adapters were made using two 3" diameter by 3" long pieces of aluminum rod, and a 2" diameter by 1" long steel rod. The press itself is a 5/8" long piece of threaded rod with a nut red Loctited onto one end.
The aluminum was faced on both sides, and then a 5mm long section was turned down to 60mm . The center was then drilled and bored out to 31mm. This allowed it to slip over the top of the spindle and press evenly on both inside and outside bearing race. It also allowed it to center over the top bore of the spindle head when pressing in the bottom bearing. The bottom adapter was again faced on both sides and the end of the OD turned down to 60mm. The center was drilled and bored out to 43mm, which is wide enough to not touch the inner bearing race. The steel rod was faced on both sides, and had the center drilled and bored out to 16.5mm, wide enough to clear the 5/8" threaded rod.
I then thermal fit the bottom bearing onto the spindle (freeze the spindle overnight and heat the bearing to 180*). Alternatively, it can be pressed into the bearing, but care must be taken to only press on the inner race. Make sure the wide part of the outer race faces the top of the spindle, and the wider part of the inner race faces the bottom of the spindle. Remember that the angular contact bearings have play between the races until preloaded. With the aluminum bottom adapter fitted in place I wanted roughly the midpoint of the play in the bearing to put the spindle's nose flush with the adapter's surface. I kept taking facing cuts on the adapter until I reached that point. So with the play removed one direction the nose sat slightly under the adapter's surface's level and with the play removed the other direction it stood slightly proud.
To press the bottom bearing and spindle into the mill head I put the 5/8" threaded rod through the center of the spindle, put the top adapter in place (the top bearing is installed later), put the bottom adapter in place over the spindle and bearing, placed the steel adapter over the bottom adapter, and ran the nut down on the threaded rod, holding everything together. The steel adapter supports the spindle's nose, which in turn supports the bearing's inner race. Since we adjusted the bottom adapter so the inner race would sit in the middle of its play, we can now press the bearing into place without applying any force to the inner race. I lightly oiled the bearing and the bore and tightened the 5/8" rod until the bearing pulled and seated into it's bore.
I then disassembled the top of the press, lightly oiled the top bearing and bore, and pressed it into place as well. On the top I needed additional clearance for the spindle, so I used a PVC pipe fitting; it worked just fine.
 |
| Bearing press assembled using old spindle and bearing. |
Honestly, the system the X2 uses for preload adjustment isn't all that great or accurate. The absolute first thing I did was face both side of the adjustment nut. From the factory it's pretty far off. This will allow even pressure to be applied to the bearing. Next I took the set screw, cut the point off, and faced it. This would still provide enough holding power to keep the nut from turning, but wouldn't damage the spindle threads. To make adjusting the nut easier, I took a 32mm socket and ground it down until I had four teeth to interface with the nut; it's much easier than using a lock ring wrench.
 |
| 32mm socket ground down to fit the spindle nut. Regarding the finish, I did it with an angle grinder, so what do you expect? |
Adjusting the preload is tricky, since I wanted to get between 100 and 125 pounds of preload. Using a torque wrench I measured how much torque was required to remove the play from the spindle, then I added 20 in/lbs of torque to that, and tightened down the nut. It was roughly 55 in/lbs of torque. Using a DTI attached to the mill head I checked for play in the spindle (if the DTI is on the table then it'll also read flex in the column, of which there is a surprising amount); on the mill you shouldn't see any play with properly preloaded bearings.
I then checked the preload by measuring the breakaway torque, meaning the amount of force required to make the spindle start to turn. This can be fairly easily calculated using a thin feeler gauge, a strong magnet, and an scale. You fix the end of the shim to the spindle using the magnet, measure the diameter of the spindle in inches where it's attached, hook the scale to the shim, wrap the shim around the spindle as far as it'll go, and then pull on the scale and see how much force in pounds is required to start turning the spindle. If you multiply that by the radius you get the breakaway torque in in/lbs. For example, I measure at the lock rings, which have a radius of 0.815". My breakaway force measured at 1.25lbs. Therefore, the breakaway torque was 1.02 in/lbs. For a mini lathe or mini mill using AC bearings, about 1 in/lbs is good, and I'd estimate a range of 0.6-1.5 in/lbs being acceptable.
Since grease can effect the breakaway torque I'll turn the spindle in the opposite direction I'm going to measure and then turn it back just slightly and then measure. I've found this technique creates a "dead spot" in the grease and almost completely eliminates its friction.
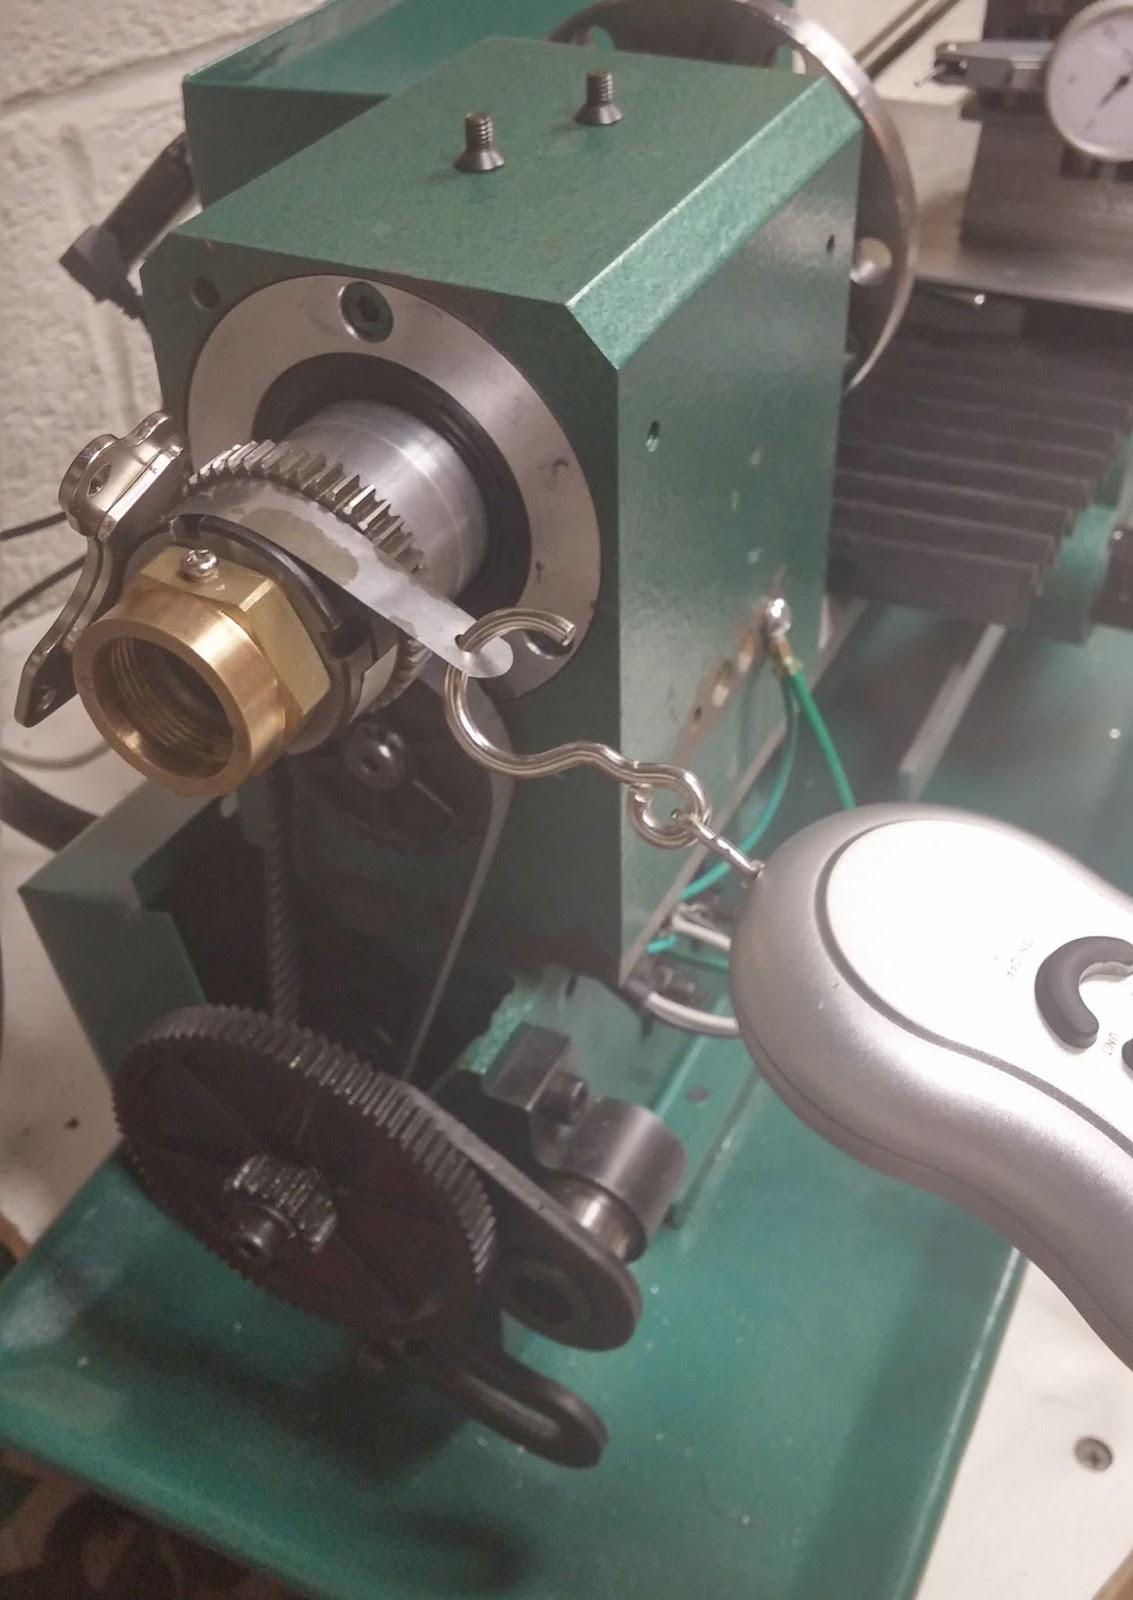 | |||||
| Measuring the breakaway torque on the mini lathe. |
Then I ran the mill at high speed for 30 minutes while monitoring the temperature of the mill head right next to the bearing. I used a IR thermometer which I pressed against the side of the mill head right at the bearing. I've checked the temperature at that location versus the temperature right at the bearing's outer race using a thermocouple and there is only a couple degrees difference. If the temperature stays under 60* C then you're fine on preload. On mine the temperature barely even reached 45* C. I then made sure to put a witness mark on the nut so I could tighten it to the exact same point every time.
Hi,
ReplyDeleteI just replaced the bearings in my HiTorque mill from Little Machine Shop with ACs, and I was having a hell of a time figuring out how to tighten the preload nut until I saw your cut up socket. Worked great. To hold the spindle itself, I clamped a large Allen socket in the R8 collet and held it with a ratchet.
I've also been trying to figure out proper preload so thanks for posting your thoughts. I'm not sure I have enough preload yet, there's no play but my breakout torque is much lower than yours, but the temps still stabilize around 67C. That's at 5000rpm, what speed did you get y our 45C value at?